If you have found that your irrigation system isn’t watering the way it’s supposed to, you might find yourself in a situation where your irrigation system needs repair. These systems can be tricky to navigate, and you want to make sure the issue is fixed, and it can be easy for the problem to get worse if the repair is done incorrectly. If you find yourself in need of some repairs, have a look at this article so you can see what important things you need to keep in mind when repairing your sprinkler line.
What Can Cause an Issue With Your Sprinkler Line?
There are many different things that might end up breaking your sprinkler line. Knowing how to avoid it can save you a repair job, so make sure you are doing your best to keep your lines in tip-top shape.
Here are a few examples of what can cause problems with your sprinkler lines:
Digging near lines: It’s easy to end up destroying your lines from excessive digging, so try your best to dig gently if you know you are searching near a line. Using a hand trowel, or even just your hands, is a much safer option than hacking away with a large shovel.
Accidental mowing: Lines are usually placed just under the ground, but natural erosion might have worn away parts of your lawn, leaving them exposed. This should be fixed eventually, but if you can’t get to it right away, make sure you avoid that area when you are mowing.
Winter: One major thing you need to worry about when it comes to your irrigation system is preparing it for the winter. If your system isn’t properly winterized, the water sitting in the pipes might freeze, which can cause cracks all over your line. Make sure you know the proper way to winterize your system before the cold weather starts so you can keep it healthy over the winter.
Pressure: Frozen soil and compact soil are much heavier than well-aerated soil. If this pressure is placed upon your lines for a long time, it can cause them to crack. You want your lines placed in areas where they won’t be disturbed by outside sources. Make sure your pipes aren’t set in an area with high traffic or areas that already get plenty of water in the soil.
How to Deal With Sprinkler Line Issues
Now that you have an idea of what can cause issues to your sprinkler line, let’s take a look at how you can tackle the issue at hand:
1) Isolate the Issue
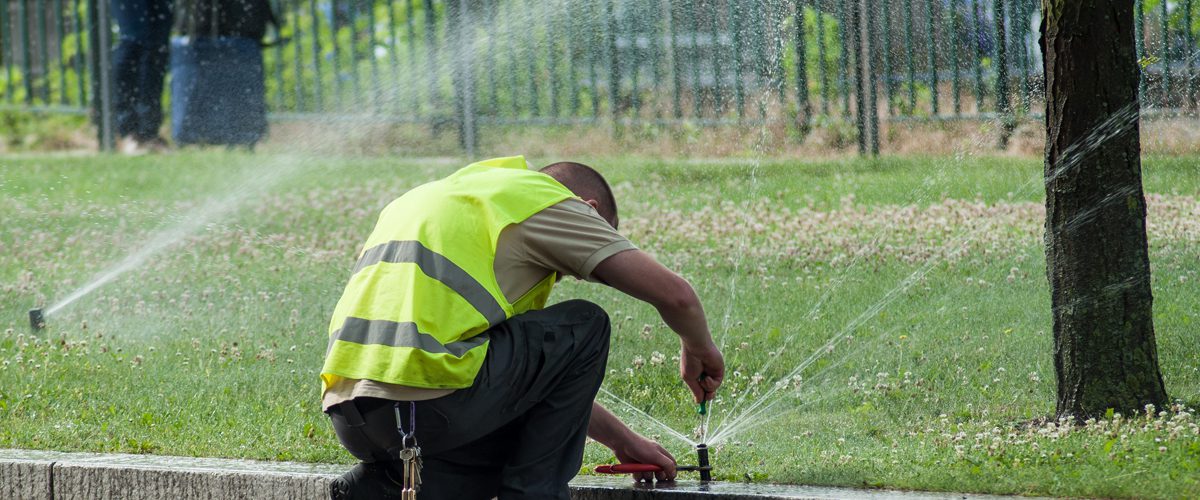
A sprinkler system is meant to water your lawn and garden without interference from you. This might mean that you have a break in your line that has been causing an issue for a few days or even weeks before you notice it. Sometimes the system can break on its own without any outside sources, and this will likely result in water forming above the ground or a spot that is excessively muddy. If your system isn’t running well on the other side of the wet area, a crack in your sprinkler line is likely the primary cause.
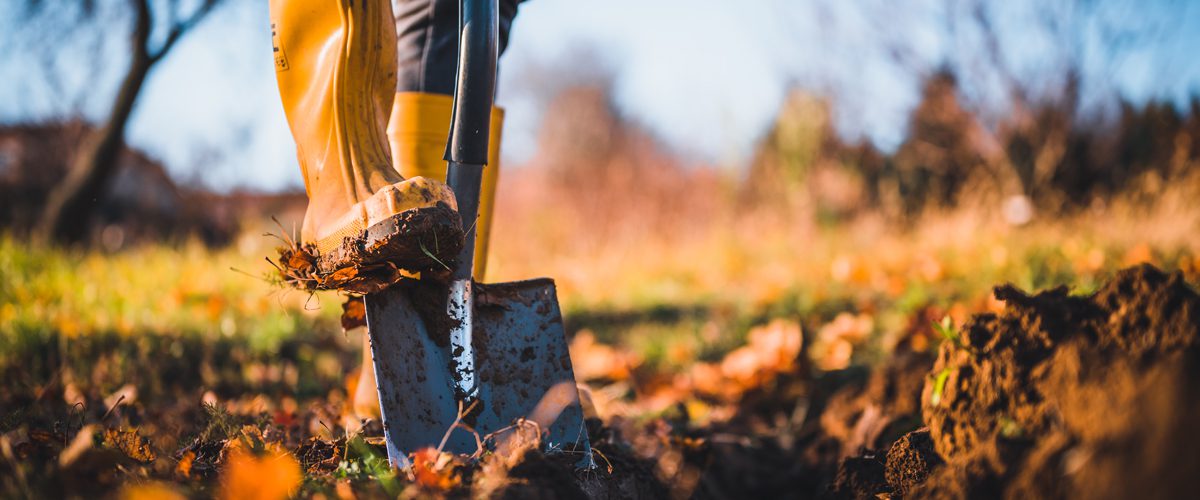
If you need to check for a break in the line, then you need to be very careful when you are digging for it. Turn off your system and start searching in the area, but try to dig horizontally instead of vertically. If you start to jam your shovel down into the dirt, then you could damage the line even further, so take some care when you begin to dig around.
Tip: Before you start repairing an underground sprinkler line, make sure you have turned your system off and let it settle for a few minutes. You don’t want a ton of pressurized water spraying at you while you try to figure out the issue, so make sure your system is off at every source before you start to dig.
2) Analyze the Damage
Once you have isolated the spot that’s broken, you should do your best to clear out the area a bit more so you can get inside and work on it. You might need to dig under the line and in a small radius around it so you can be comfortable cutting out the damaged areas. You will likely need to use some PVC pipe cutters, which will work for both hard and soft lines.
You want to make sure you are cutting out the entire piece that is damaged, so you need to inspect both sides of the line when you are done. Look for cracks along either side to make sure all the damage has been removed. Once you have taken out the damaged piece, you should measure the area between the ends of the line so you can be sure you are getting the correct length for your replacement part.
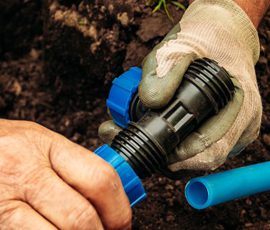
You also need to make sure you measure the diameter of your line so you can get a piece that matches it perfectly. Your new piece should be slightly larger in diameter so it can comfortably fit around the old pipes. This step will also depend on how bad the damage is. If it’s just a small cut, then you can usually get away with using a pre cut piece of PVC pipe from a hardware store, but if it’s longer, you will need to get a bit more as far as supplies go.
Tip: If you want to make sure you are getting the perfect piece, you can always bring the damaged chunk with you to buy your pieces. A hardware store employee will likely be able to match your piece to the correct parts while you’re there, which means you will only have to make one trip.
3) Get Your Repair Equipment Ready
What you will need will largely depend on the extent of the damage and what your system setup looks like. We’re just going to talk about what a basic repair would be for a regular hard or soft PVC line. If you have a more extensive system or you notice extra damage, you might need to contact your local landscaping experts to come in and assess the next step.
A hardware store will likely have everything you need to repair your line, but you need to make sure you are buying the correct supplies for your system. Some repairs will require a coupler that goes inside the pipes, while others use pieces that go outside the pipes, which will require primer and glue. If you are using a coupler for your irrigation repair, you will likely need a special tape that is used for pipe repairs.
Tip: You can choose the type of repair you want to do, but typically, using a coupler for the interior works best for soft pipes, while using something like a Quick-Fix coupling works best for hard PVC. The Quick-Fix coupling allows you to slide the new piece of piping into place while you extend the Quick-Fix piece out like a telescope and over the new piece, which creates a tight seal.
4) Start Your Repairs
No matter how you decide to repair your line, you need to ensure everything is clean before you start. It’s hard for glue or tape to stick to a dirty pipe, so wipe it down with a clean cloth on the inside and outside before you start.
There are plenty of different repair kits available that are built for smaller holes and cracks. Some of these kits have specific steps you need to take for the repair to work properly. It’s best to follow the instructions step by step, as many of these kits are built to work with the parts provided only. Swapping out pieces for your own or skipping steps could result in causing even more damage to the line, which will put you back at square one.
Tip: You should also try to scuff up the area where you apply the glue or tape to make sure it sticks onto the pipe with a tight seal. Many new pipes are coated to ensure they stay protected from the elements, and scuffing them with sandpaper will easily remove them.
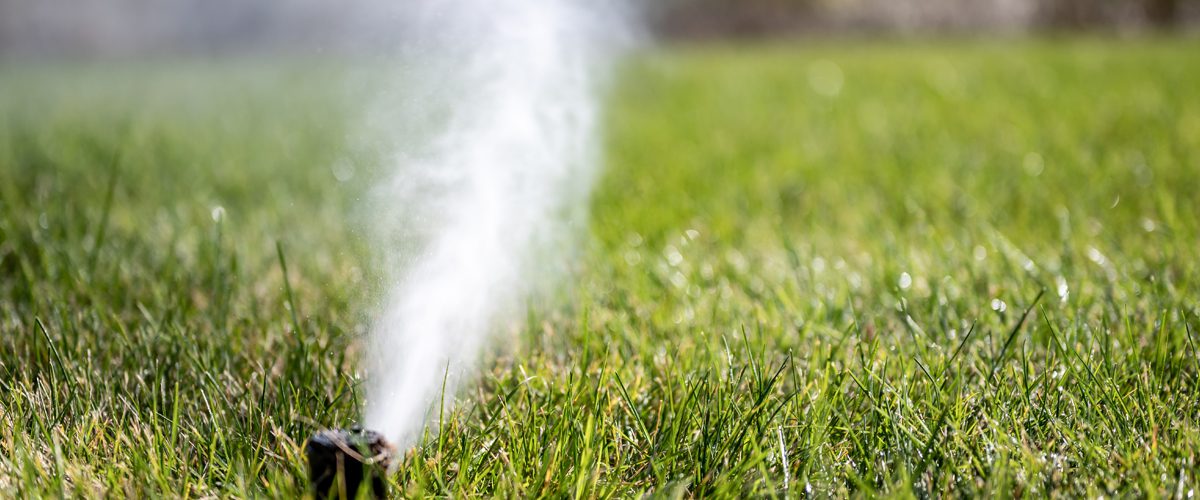
5) Test the Line
You must wait the required amount of time to ensure that whatever glue or tape you have in place will hold when you run your irrigation system at full strength. If you can, try running it with low pressure first, so you can get a good idea of how well your repair is holding. If everything seems to be going well, then turn it up to full strength. Hopefully, your repair has worked, but if not, it’s a good idea to pull off the parts and try it all again.
Tip: Make sure you are standing away from the repaired area when you turn the system on at full strength. Flying parts are a significant concern, and it’s a good idea to stay as safe as possible around high-pressurized water.
Repairing your sprinkler line is easy as long as you make sure you get the right parts and have a bit of knowledge about how your system works. If you find that your repairs still aren’t working, then you should call a professional. They can come in and assess your system to make sure that the problem is getting fixed as soon as possible.